Geographic Skills · 03

Map Skills

Learn to locate accurately, read spatial patterns and turn maps into geographic evidence.

LocateInterpretAnalyseEvidence
N
13°45′N100°30′EBangkok · locate precisely
1Location
2Grid references
3Scale & distance
4Relief & contours
5Thematic maps
01

FOUNDATION

Location: say exactly where

Geographers need a shared language for position. Begin with direction, then move to latitude and longitude so you can describe relative and absolute location accurately.
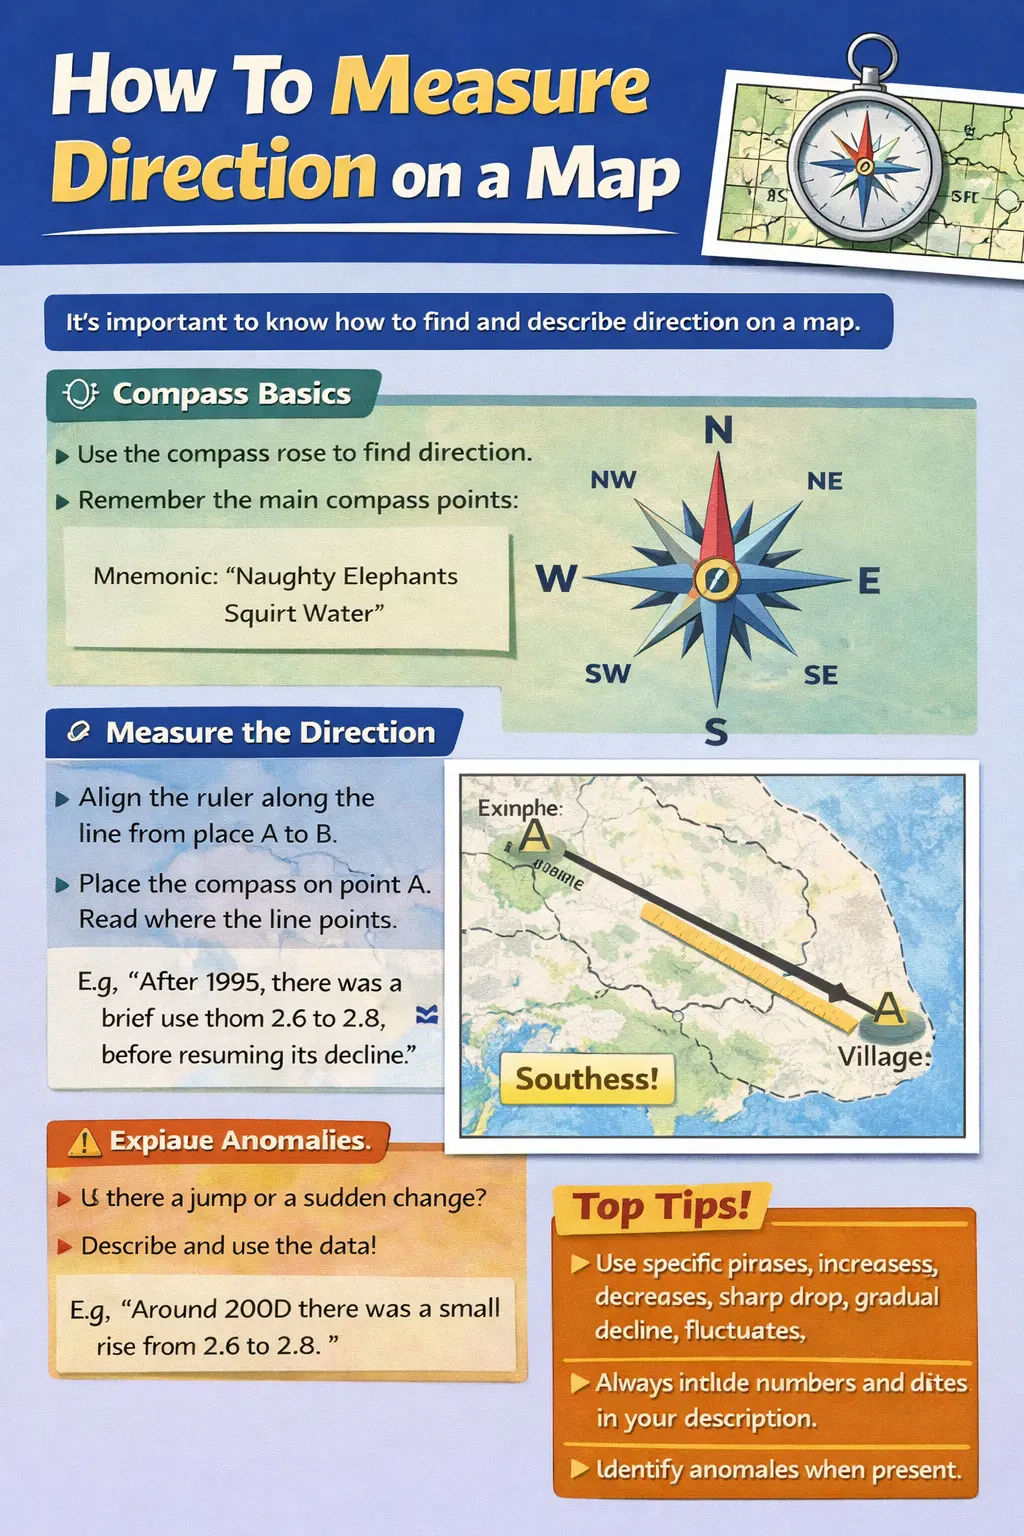
Student guide to measuring direction on a map
1A · DirectionUse the compass rose and eight-point directions to describe where places lie in relation to each other.
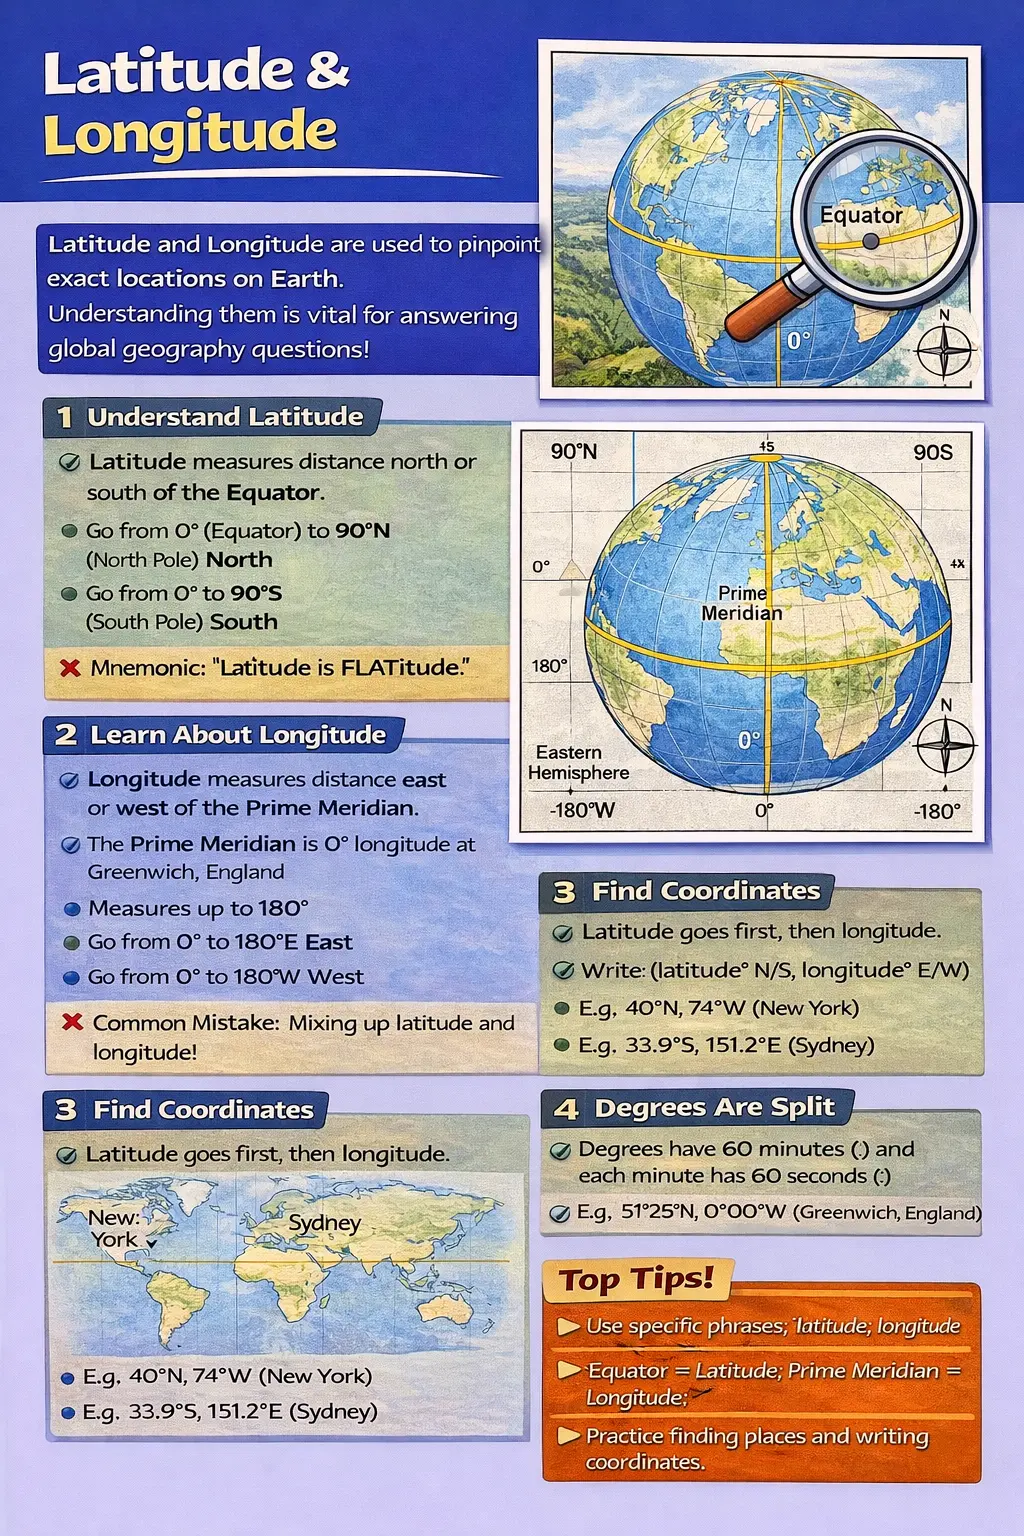
Student guide to latitude and longitude
1B · Latitude & longitudeLatitude first, longitude second. Always include N/S and E/W.
Direction
NW+ES

Use cardinal and intercardinal directions to describe one place relative to another.

Latitude & longitude
LATITUDE ↔LONGITUDE ↕

Latitude comes first, then longitude. Include the hemisphere: N/S and E/W.

Political units
WorldCountryRegionCity

Choose a useful scale and use named places. “Southeast Asia” and “Bangkok” communicate different levels of detail.

Quick habitWhen you meet a new case study, locate it before you learn what happens there.
Try itLocate Bangkok, Sydney and New York. For each, give a compass relationship to another place and an approximate latitude/longitude.
02

PRECISION

Grid references: along, then up

Grid references give a precise location on a gridded map. Always read eastings first, then northings.
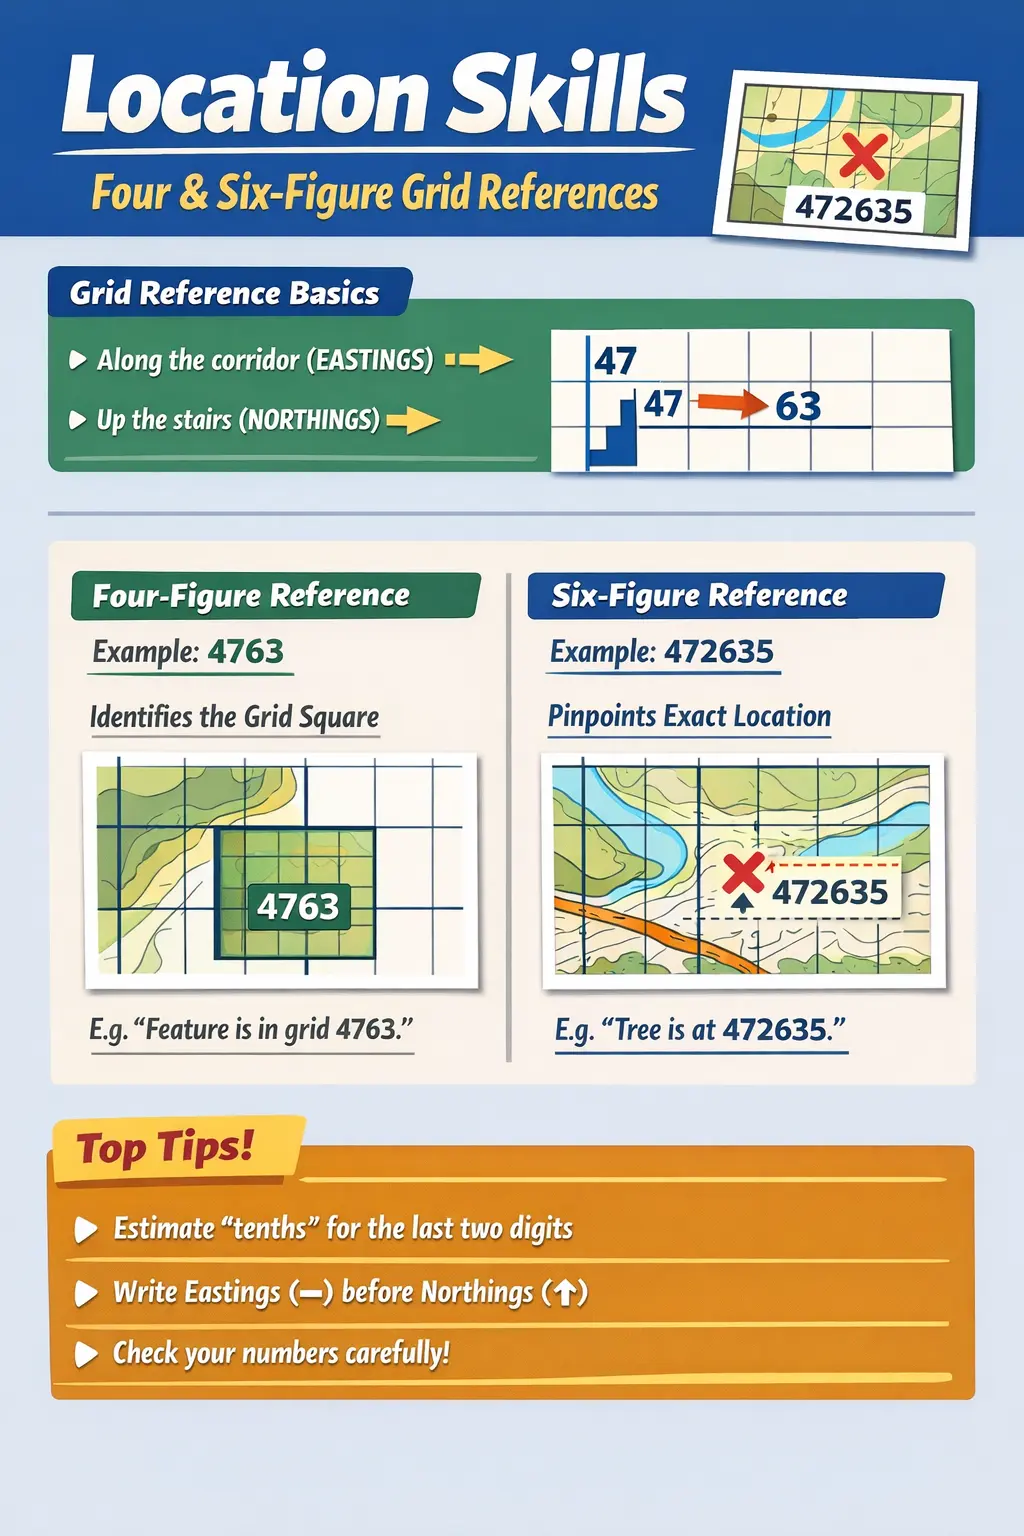
Four and six figure grid reference guide
VISUAL GUIDE

Four & six-figure grid references

Start with the square, then increase precision. Remember: eastings first, northings second — along the corridor, then up the stairs.

Four figures identify a grid square. Six figures estimate tenths within that square to pinpoint a feature.

EASTINGS →
NORTHINGS →
1122

Along the corridor → then up the stairs ↑

4 FIGURE1122

Identifies the whole grid square. Read the easting on the left edge, then the northing on the bottom edge.

6 FIGURE113226

Add a third digit to each coordinate by estimating tenths across and tenths up the square. This pinpoints a feature.

PUT IT INTO PRACTICE

Six-Figure Grid Reference Challenge

Use the map key, identify the features, then move from four-figure to six-figure references. Check your work with the answer page.

Open practice sheet ↗
Self-check: what order are the digits in a six-figure reference?

Three digits for the easting, then three digits for the northing. Read along first, then up.

03

MEASUREMENT

Scale & distance: map to real world

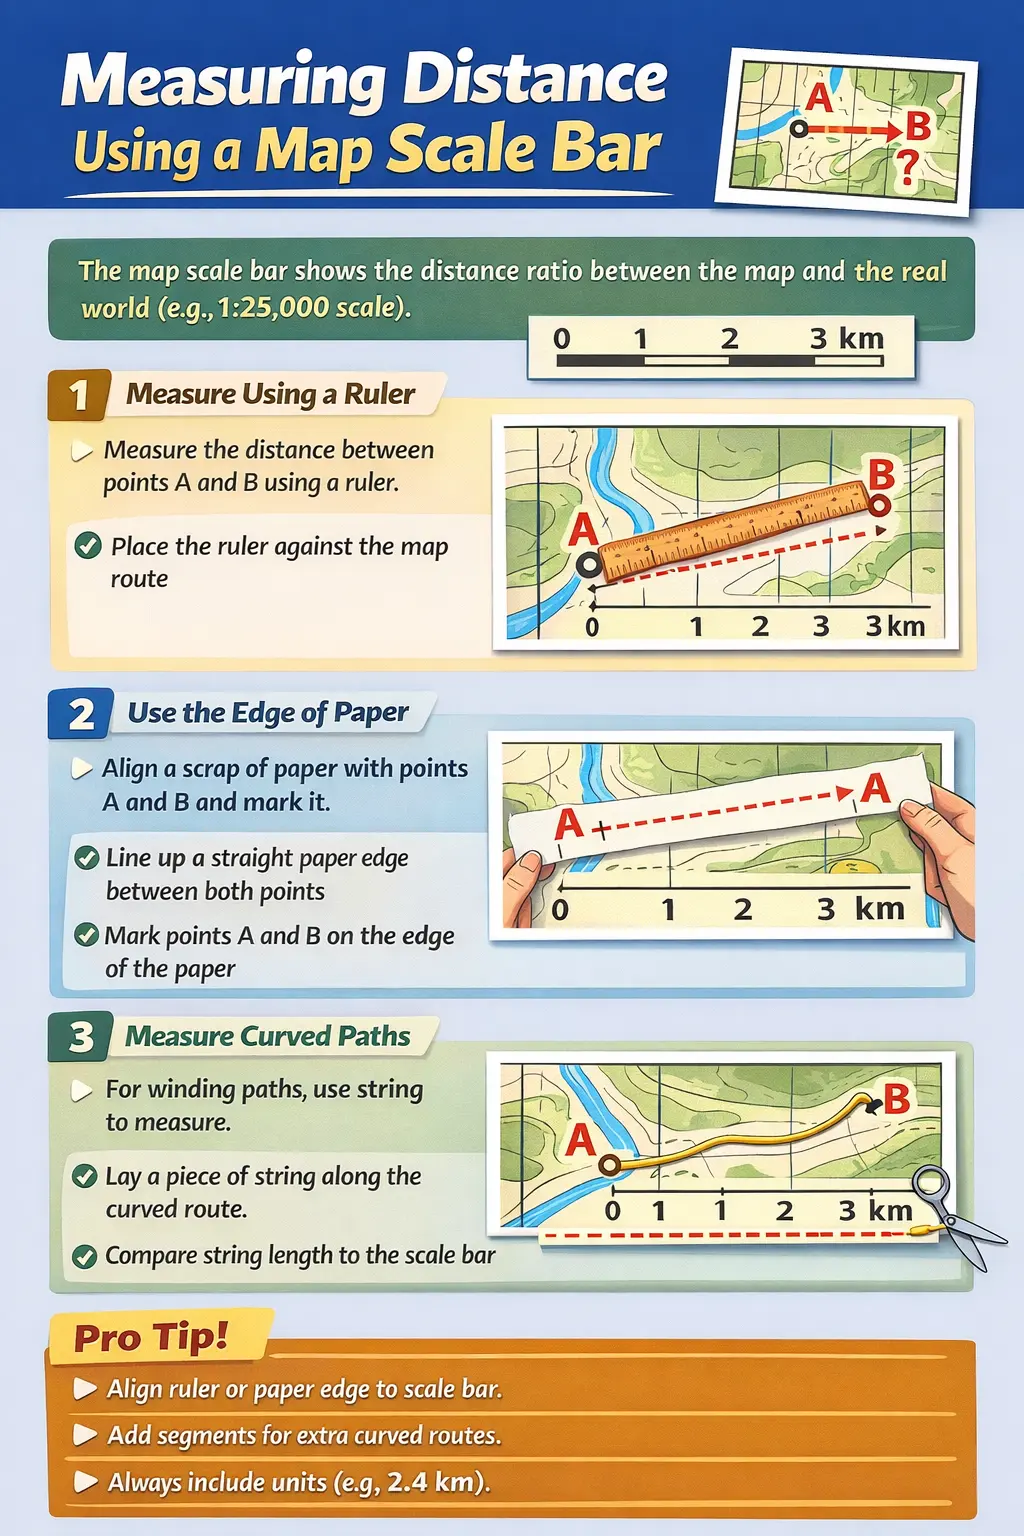
Scale is the relationship between distance on a map and distance on the ground. Always keep the units visible while you calculate.
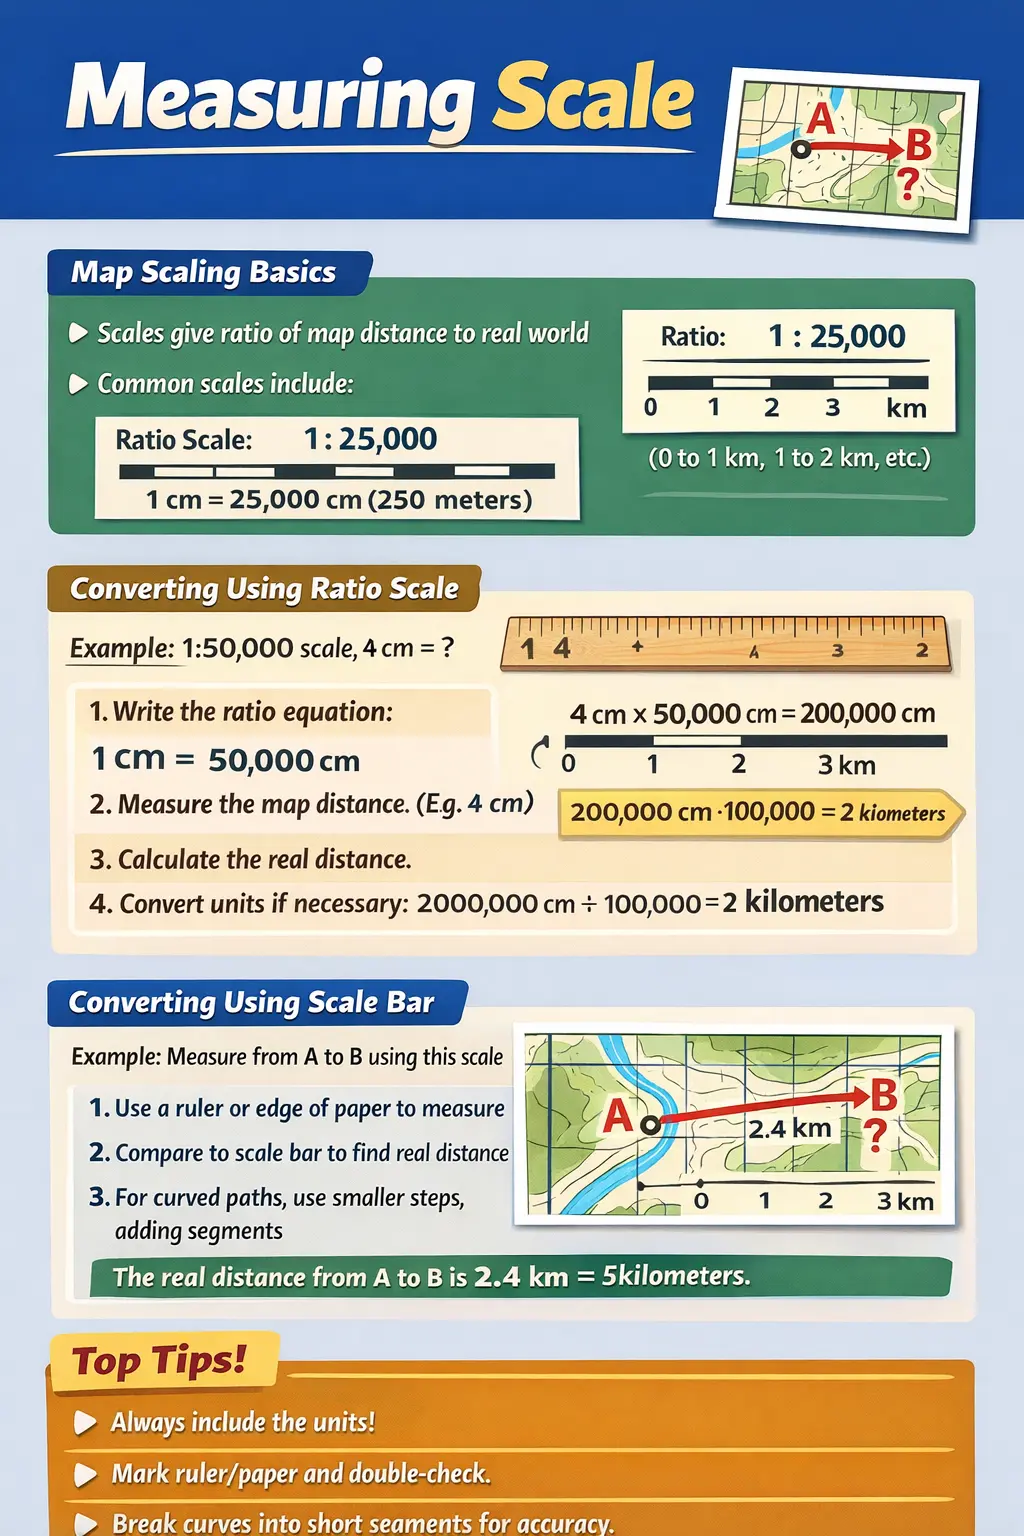
Student guide to measuring map scale
3A · Understanding scaleRead ratio and bar scales, measure carefully and convert units.
Student guide to measuring distance using a map scale bar
3B · Measuring distanceUse a ruler, paper edge or short segments for curved routes, then compare with the scale bar.
0123 km
STEP 1Measure

Find the map distance with a ruler or the scale bar.

STEP 2Convert

Apply the stated scale and convert units carefully.

STEP 3Sense-check

Ask whether the final distance is realistic for the mapped area.

Try itMeasure one straight-line distance and one curved route. Show your working and include the correct real-world units.
04

PHYSICAL MAPS

Topographic maps, relief & contours

Topographic maps turn a three-dimensional landscape into a readable two-dimensional map. Read the key, spot heights and contour interval before interpreting relief.
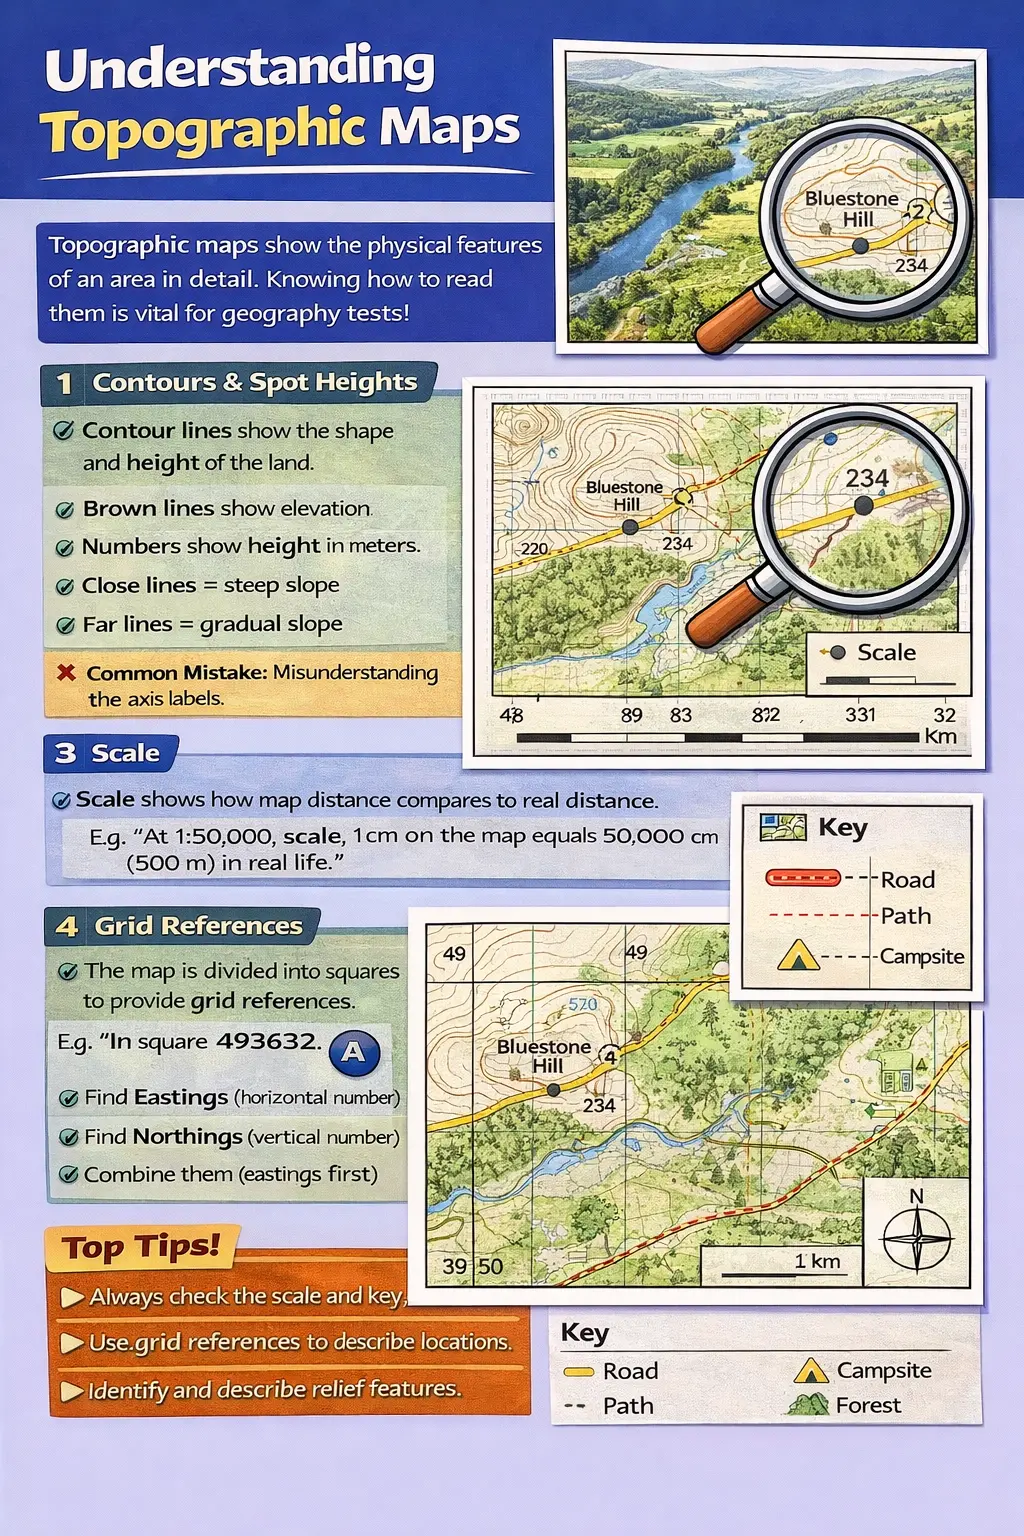
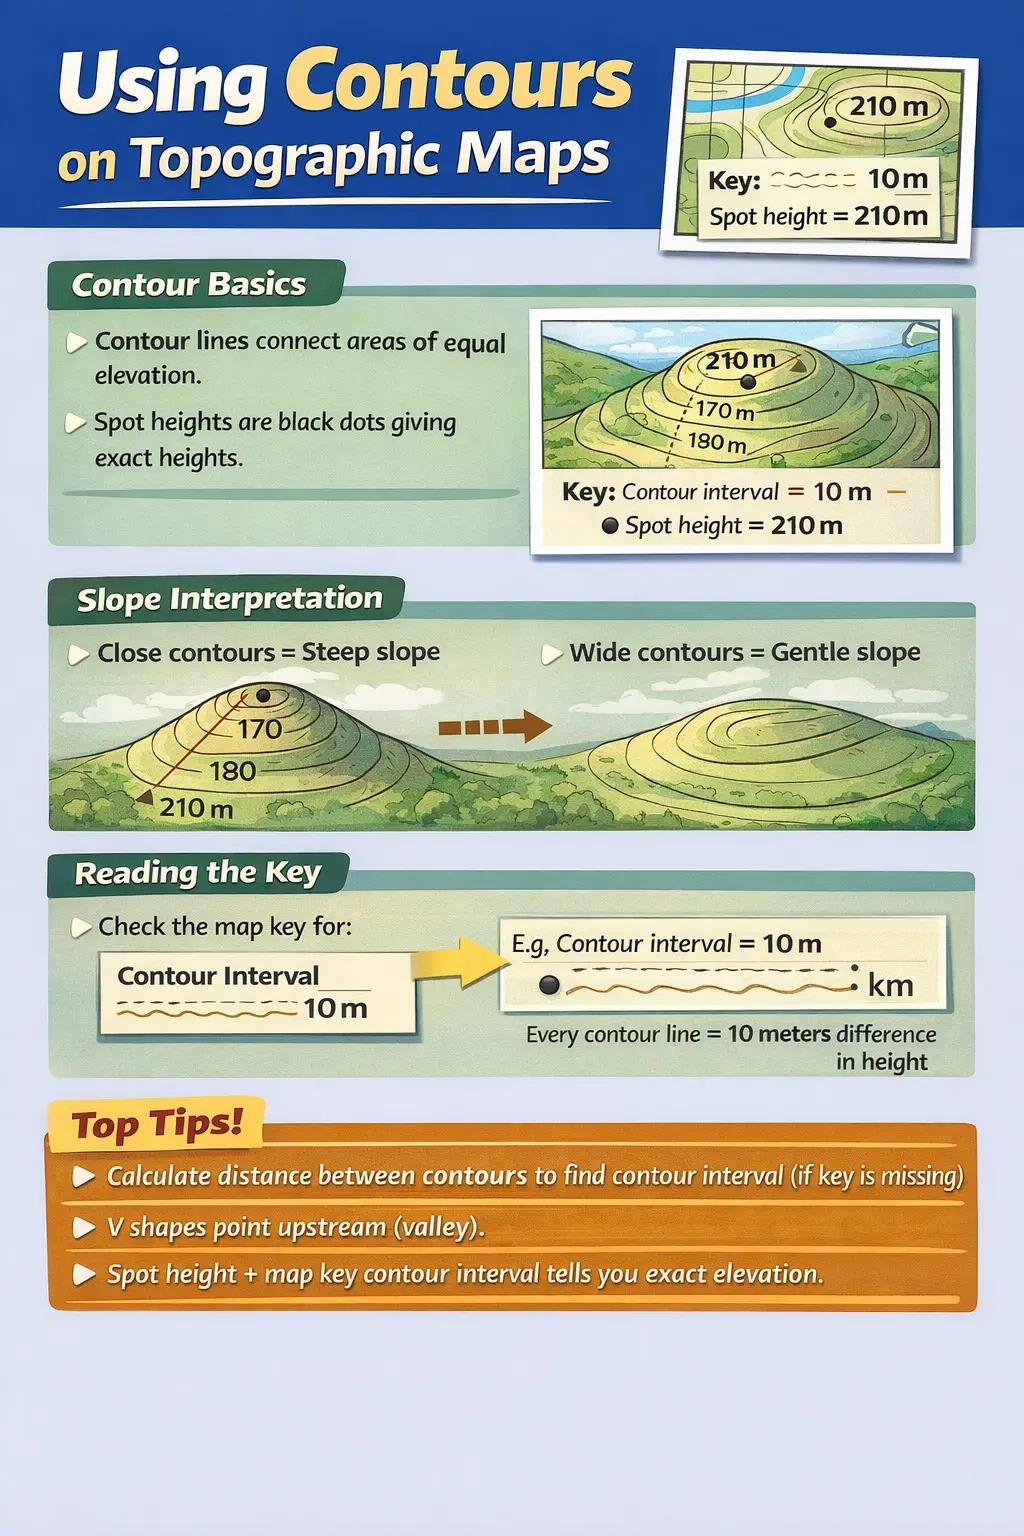
Student introduction to topographic maps
4A · Reading topographic mapsCombine the key, scale, grid and contour information to understand the landscape.
Student guide to contours on topographic maps
4B · Contours & reliefClose contours indicate steeper slopes; wider spacing indicates gentler slopes. Use spot heights for exact elevations.
Contour intervalThe vertical difference in height between neighbouring contour lines.
SlopeCompare contour spacing: close = steep, wide = gentle.
ValleysContour V-shapes normally point upstream where they cross a valley.
Try itOn a topographic map, identify the highest point, a steep slope, a gentle slope and a valley. Support each choice with map evidence.
05

THEMATIC MAPS & EXAM SKILL

Read patterns, quantify & explain

Thematic maps turn data into spatial patterns. Learn to recognise the map type, describe the pattern, quantify it, identify anomalies and suggest geographic reasons.
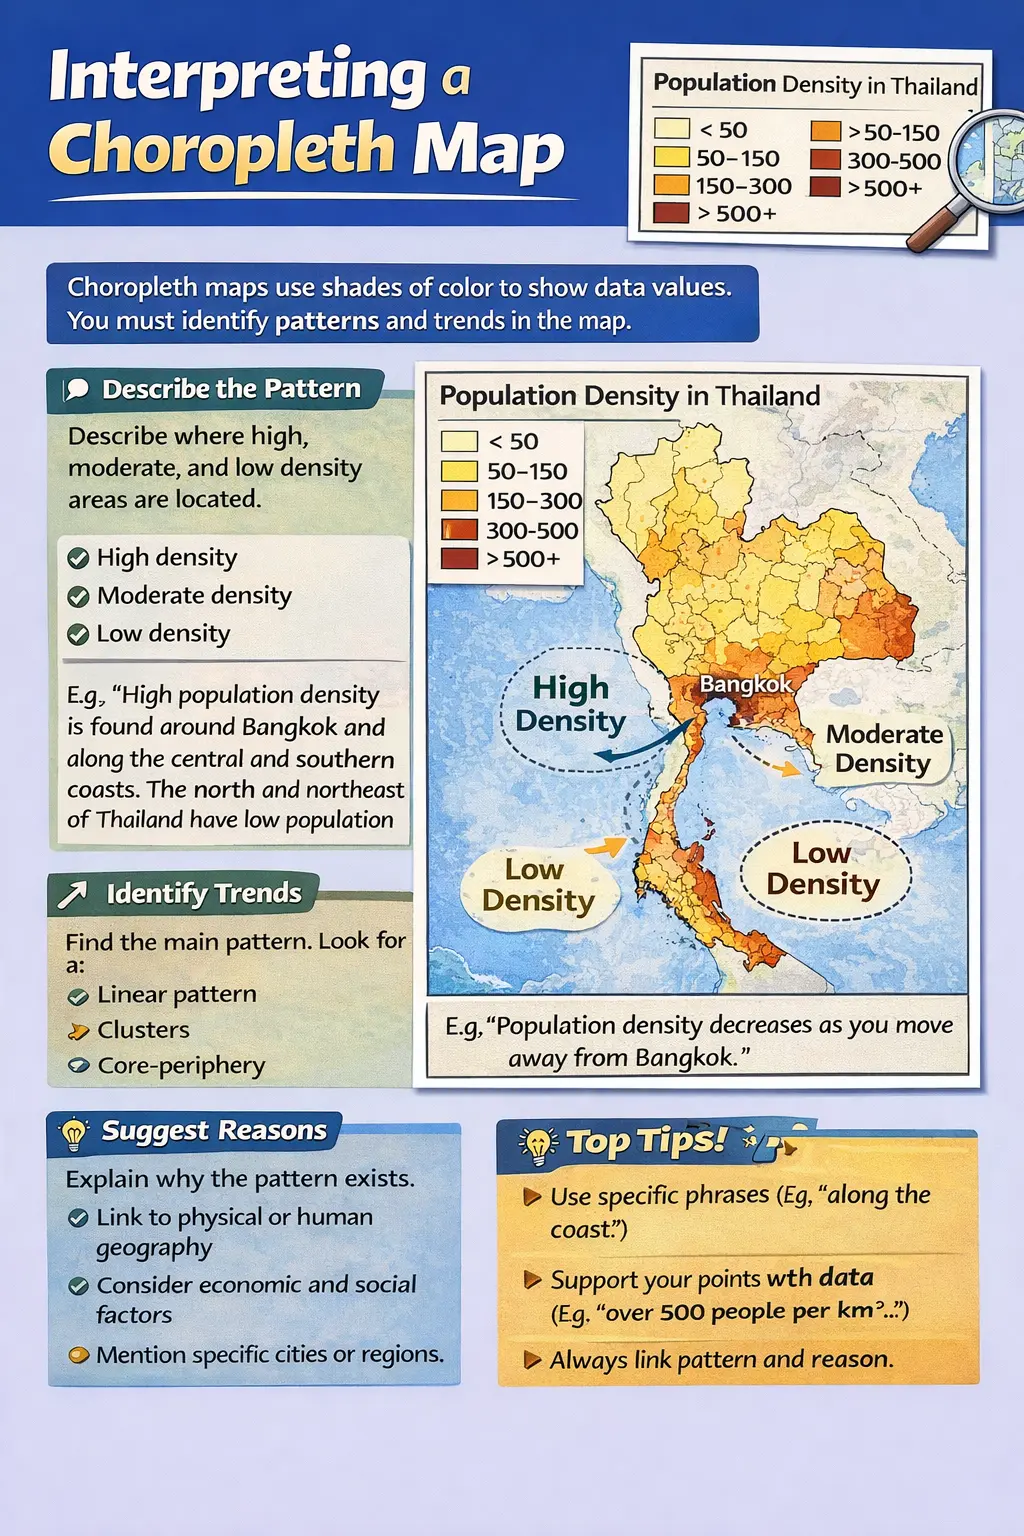
Student guide to interpreting a choropleth map
5A · Choropleth mapsRead the classes, locate high and low values, then describe the spatial trend.
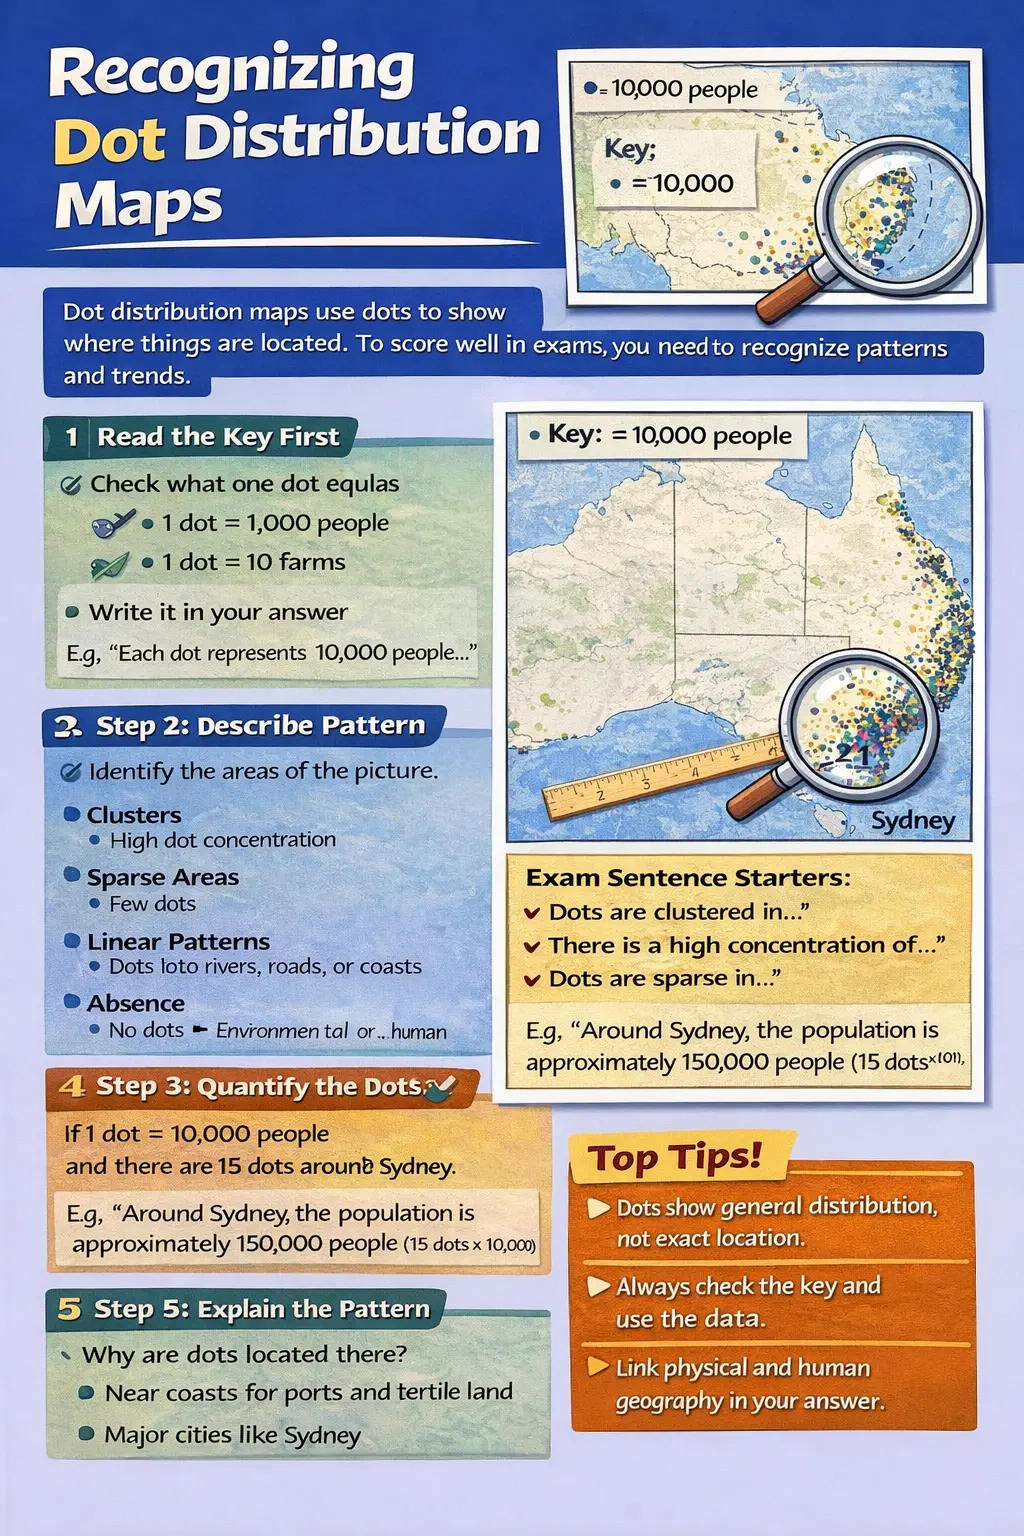
Student guide to recognising dot distribution maps
5B · Dot mapsCheck what each dot represents, then describe clusters, sparse areas and linear patterns.
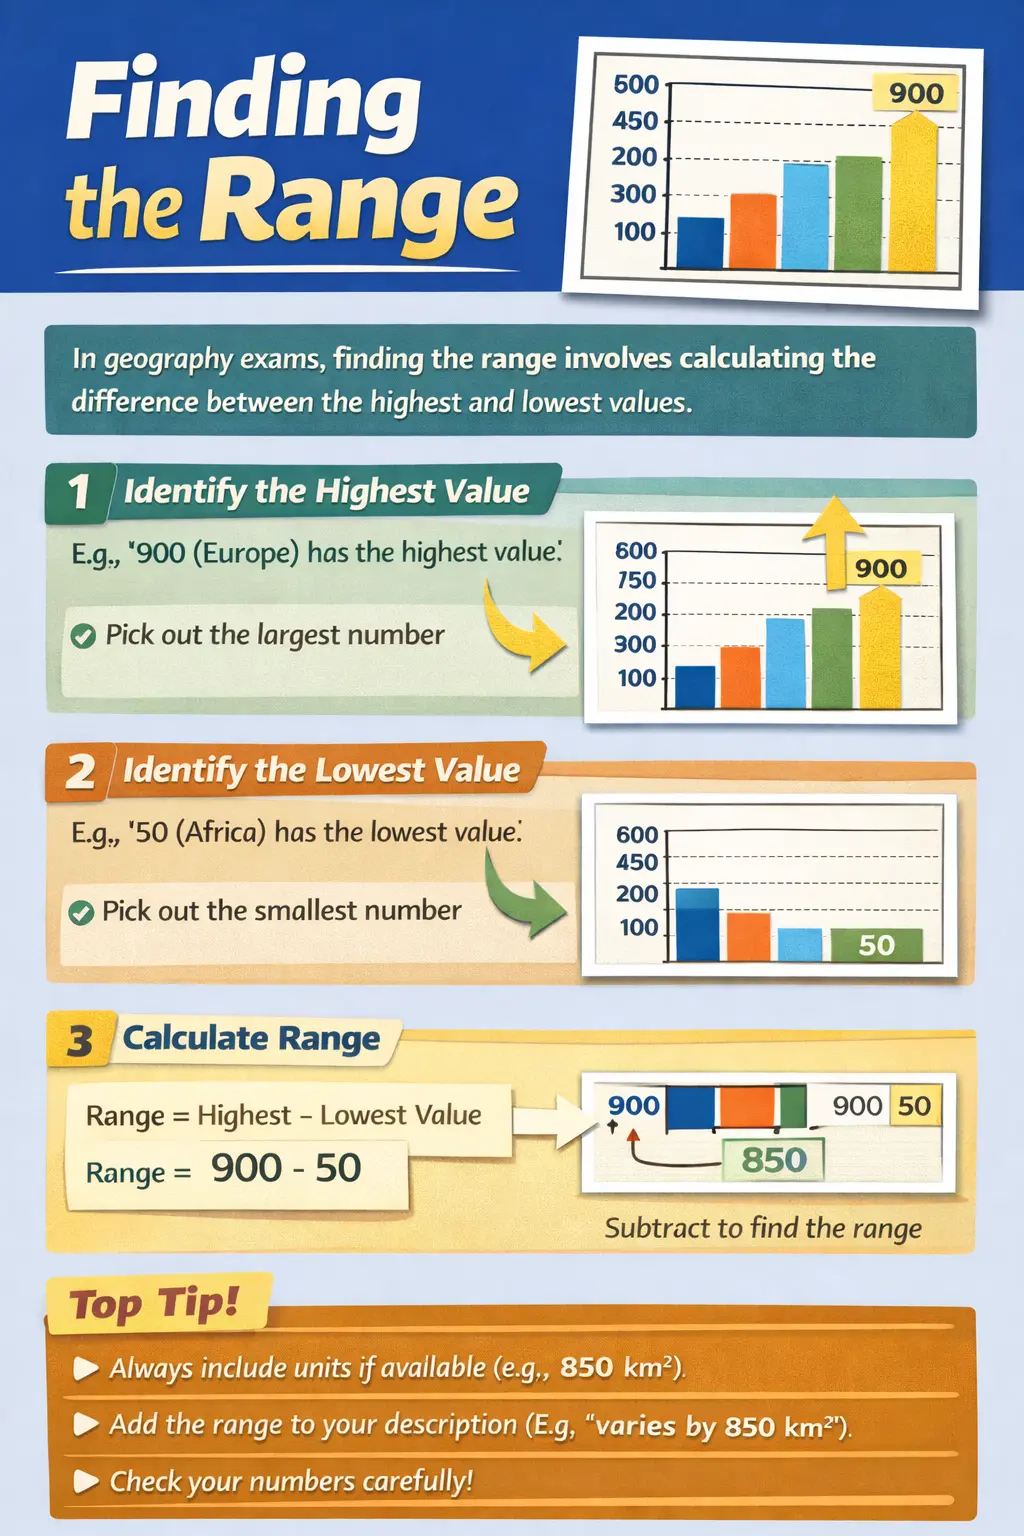
Student guide to calculating the range of data
5C · Quantify with rangeRange = highest value − lowest value. Include units where available.
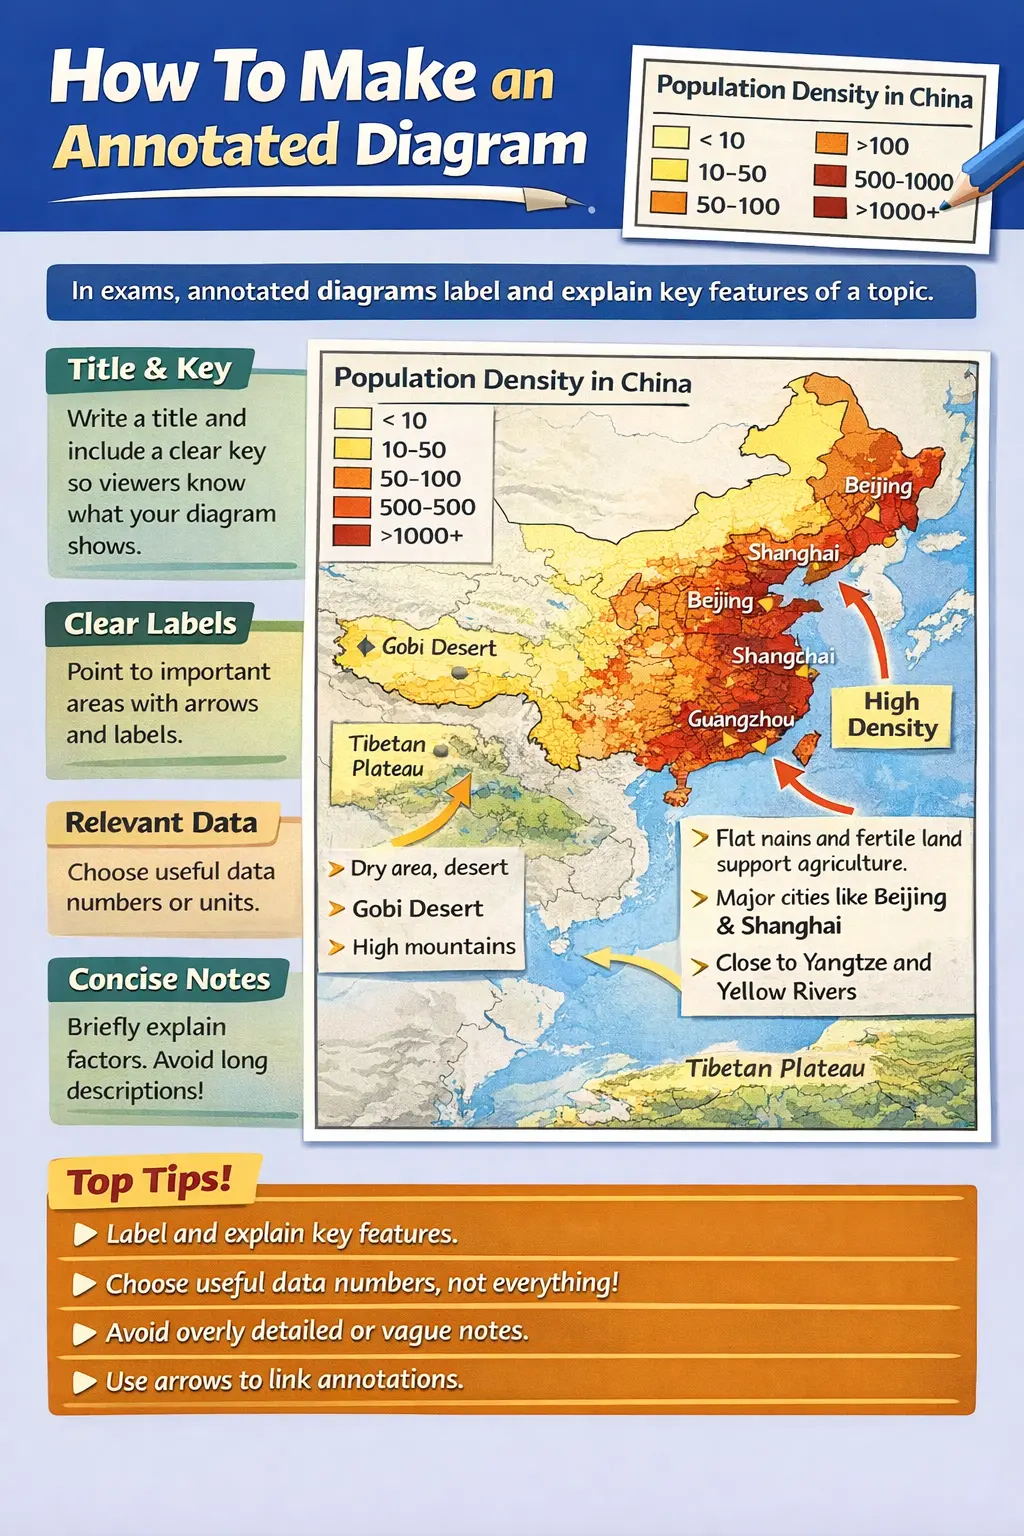
Student guide to making an annotated geographic diagram
5D · Annotate evidenceUse a title, key, labels, selected data and concise explanatory notes.
01Topographic

Relief, height, drainage, settlement and land use

02Choropleth

Rates or values shaded by area

03Isoline / isopleth

Lines joining places with equal values

04Dot

Distribution and concentration of a phenomenon

05Flow

Movement between places

06Proportional symbol

Symbol size represents quantity

Map-reading checklistTitleLegendScaleDirectionUnitsDate/source

Turn the map into evidence

01Locate

Where is the pattern? Name places, directions and scale.

02Describe

State the overall pattern before zooming into detail.

03Support

Use values, named places and contrasts as evidence.

04Notice

Identify an anomaly or exception that matters.

05Explain

Link the spatial pattern to relevant geographic processes.

UPGRADE YOUR LANGUAGE

“It is high in the north.”

“The highest values are concentrated in the north and north-east, while the south records consistently lower values; the main exception is…”

Try itChoose any map from your current IB unit. Identify its type, describe one overall pattern, add two pieces of located evidence, identify an anomaly and suggest one reason.
IB

COURSE REFERENCE

Where map skills fit

The IB Geography skills reference makes map work part of a wider toolkit. These skills should be practised across the course rather than treated as a one-off unit.

Locate & differentiate

Direction · latitude/longitude · grid references · scale · political units

Interpret & construct

Maps · graphs · diagrams · images · satellite and photographic evidence

Calculate

Averages · frequencies · ranges · densities · percentages · ratios

Process & interpret

Patterns · trends · relationships · anomalies · inferences · decisions

Collect & select

Observations · field sketches · interviews · measurements

Evaluate & communicate

Accuracy · relevance · bias · clear written responses to command terms

Download the full IB Geography skills reference ↓

Map skills become useful when they become automatic.

Locate precisely. Read the pattern. Use the evidence.

← Back to Skills, Revision & Inspiration